Adding a Widget
Widgets put your glyph art right on your home screen. No need to flip the phone over or open the app. Your art is just there, always visible.
Long-press your home screen, tap Widgets, and find Glyph Museum in the list. Pick a size (1x1, 2x2, or 3x3). All three show the same circular glyph art, just at different physical sizes on your home screen.
Once you place the widget, the frame selector opens automatically so you can pick which Frame to display. Any changes you make to a Frame in the app sync to the widget automatically.
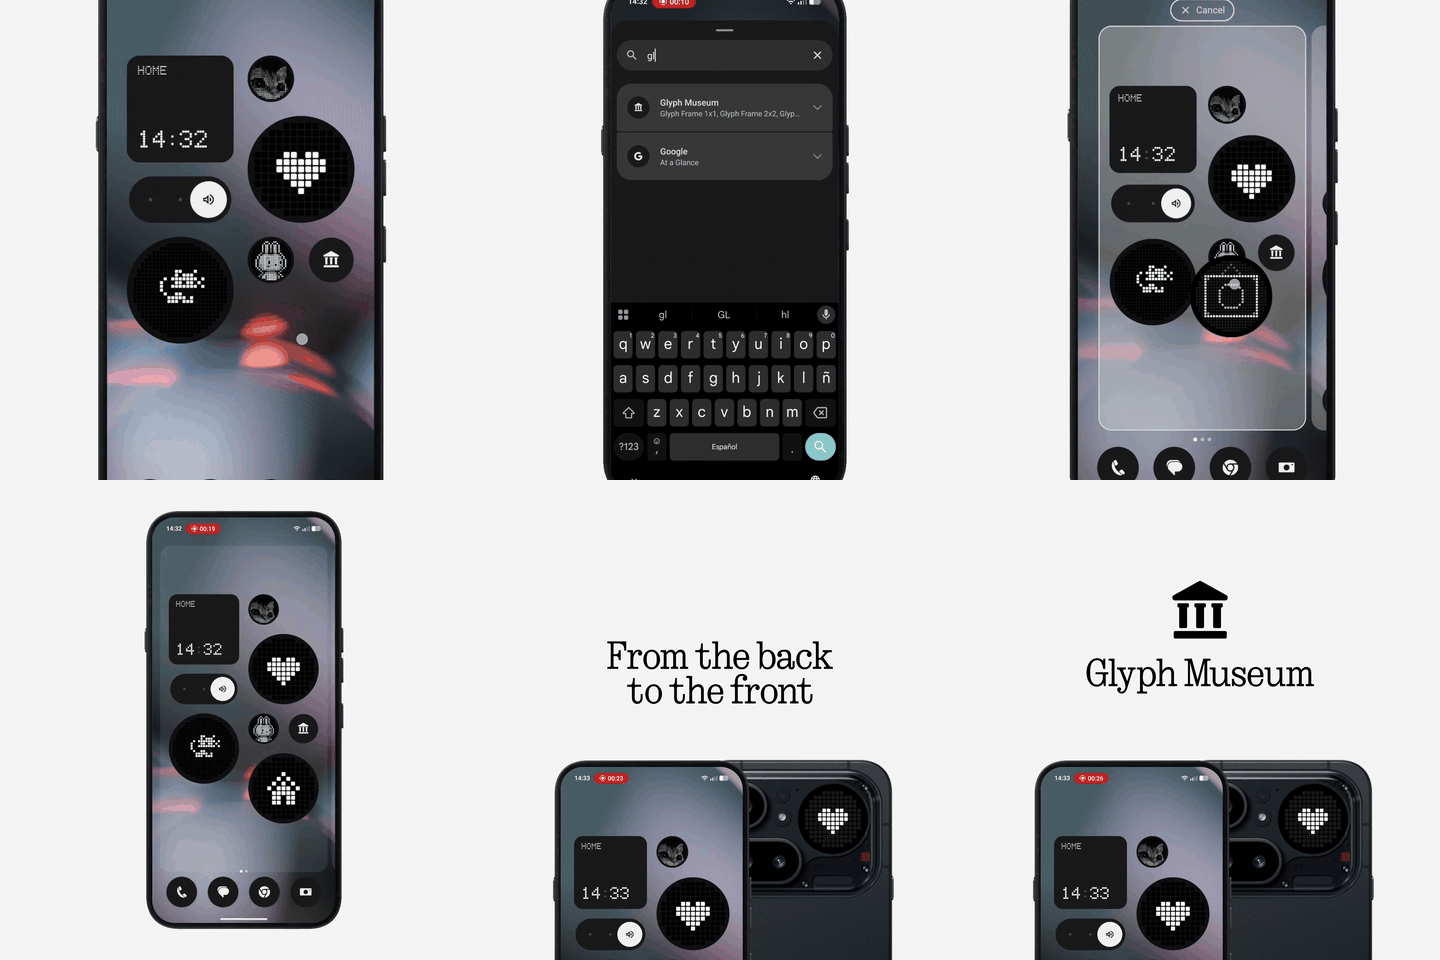 widget-add.gif
Choosing a Frame
The frame selector popup has two tabs at the top: Frames and Config. The Frames tab shows all your Frames. Tap one to assign it. A red border highlights the current selection so you always know which one is active.
These are the same Frames from the Frames tab in the app. Whatever you've set up there is what you'll see here.
Want to switch later? Tap a static widget to reopen the selector and pick a different Frame. You can also long-press any widget to get to "Widget settings" from the OS menu.
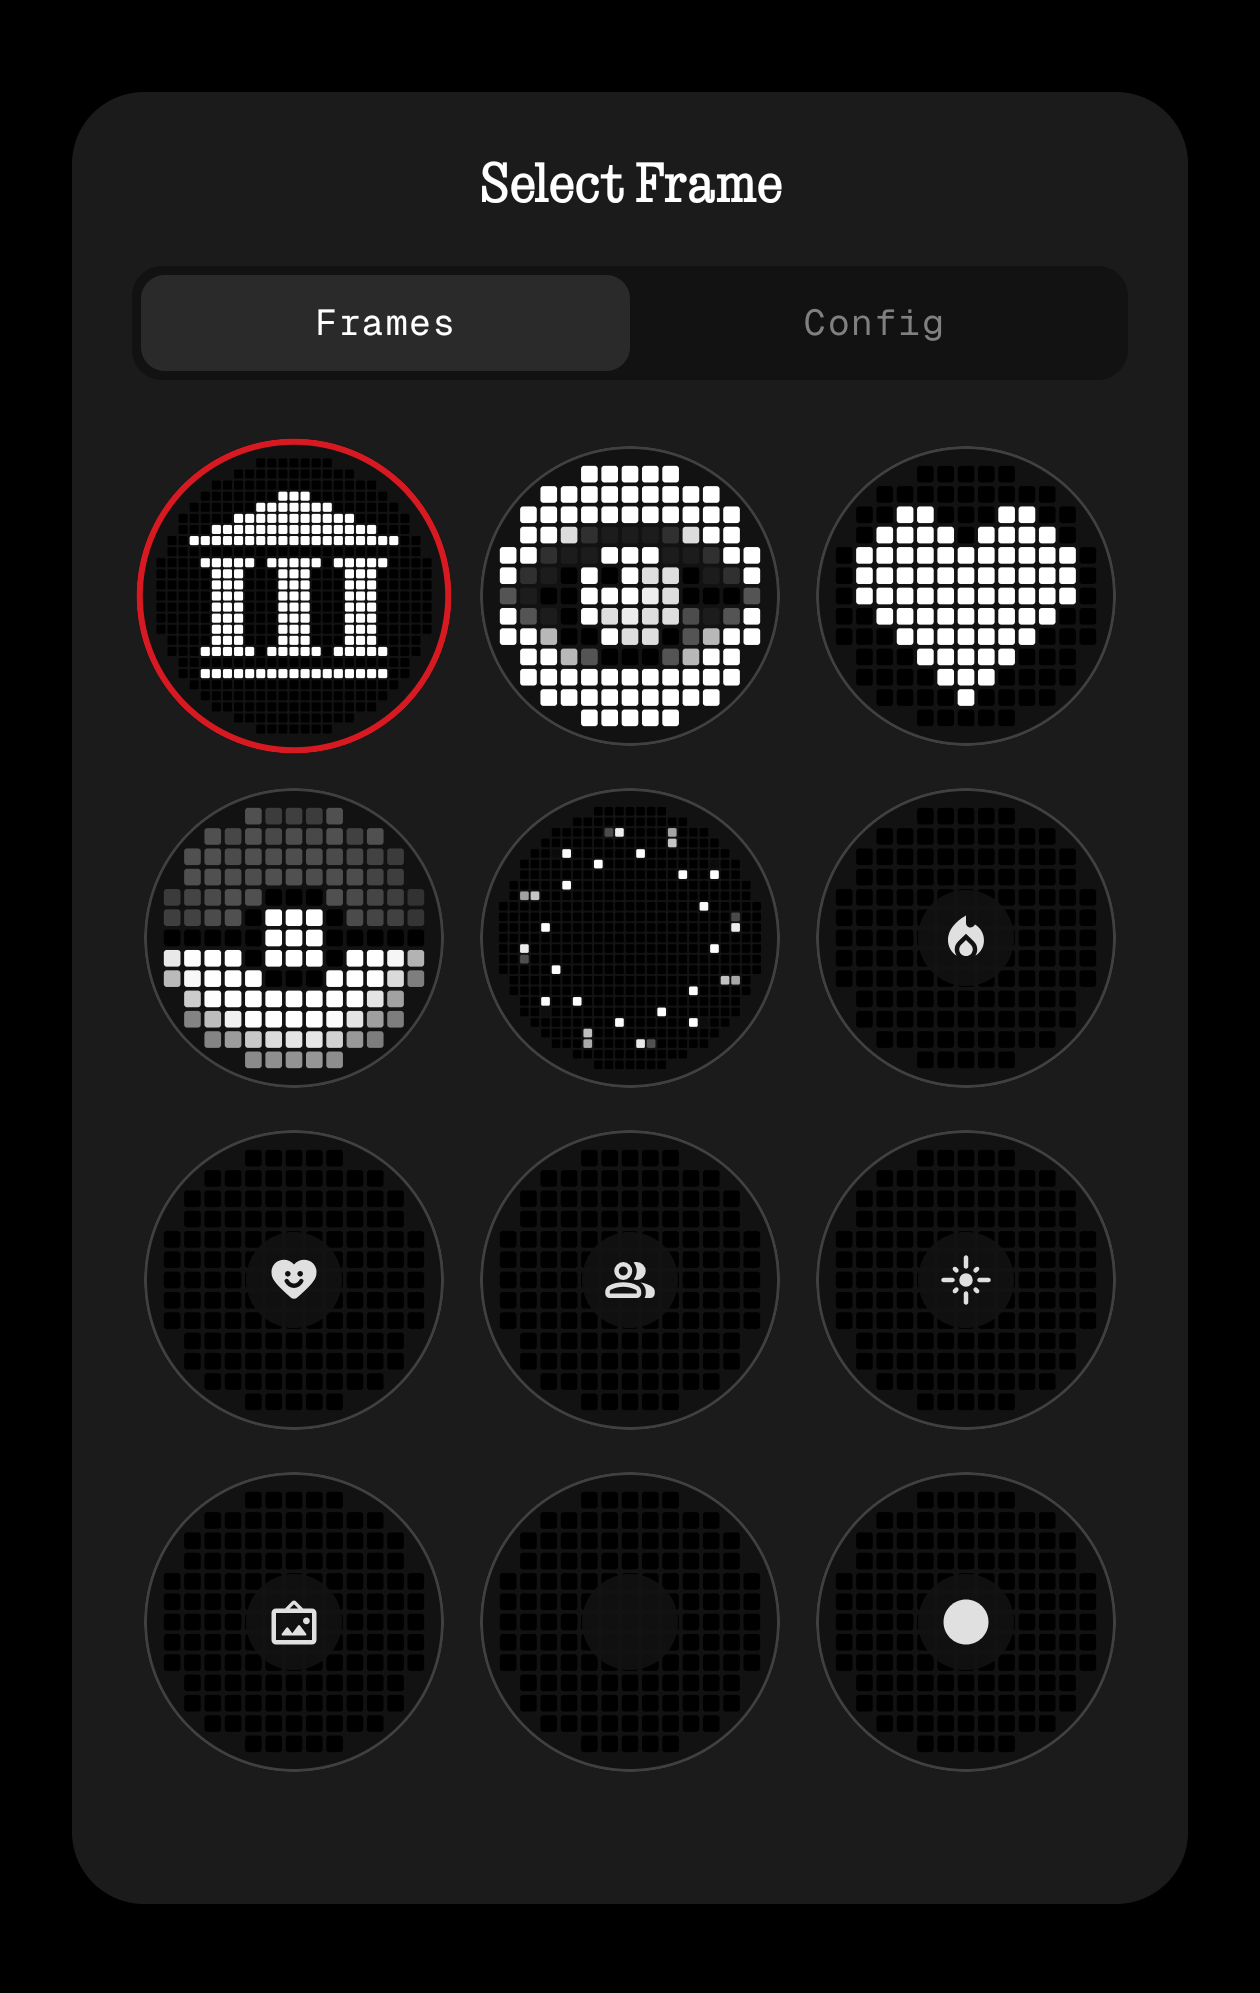 widget-frame-selector.png
Background Modes
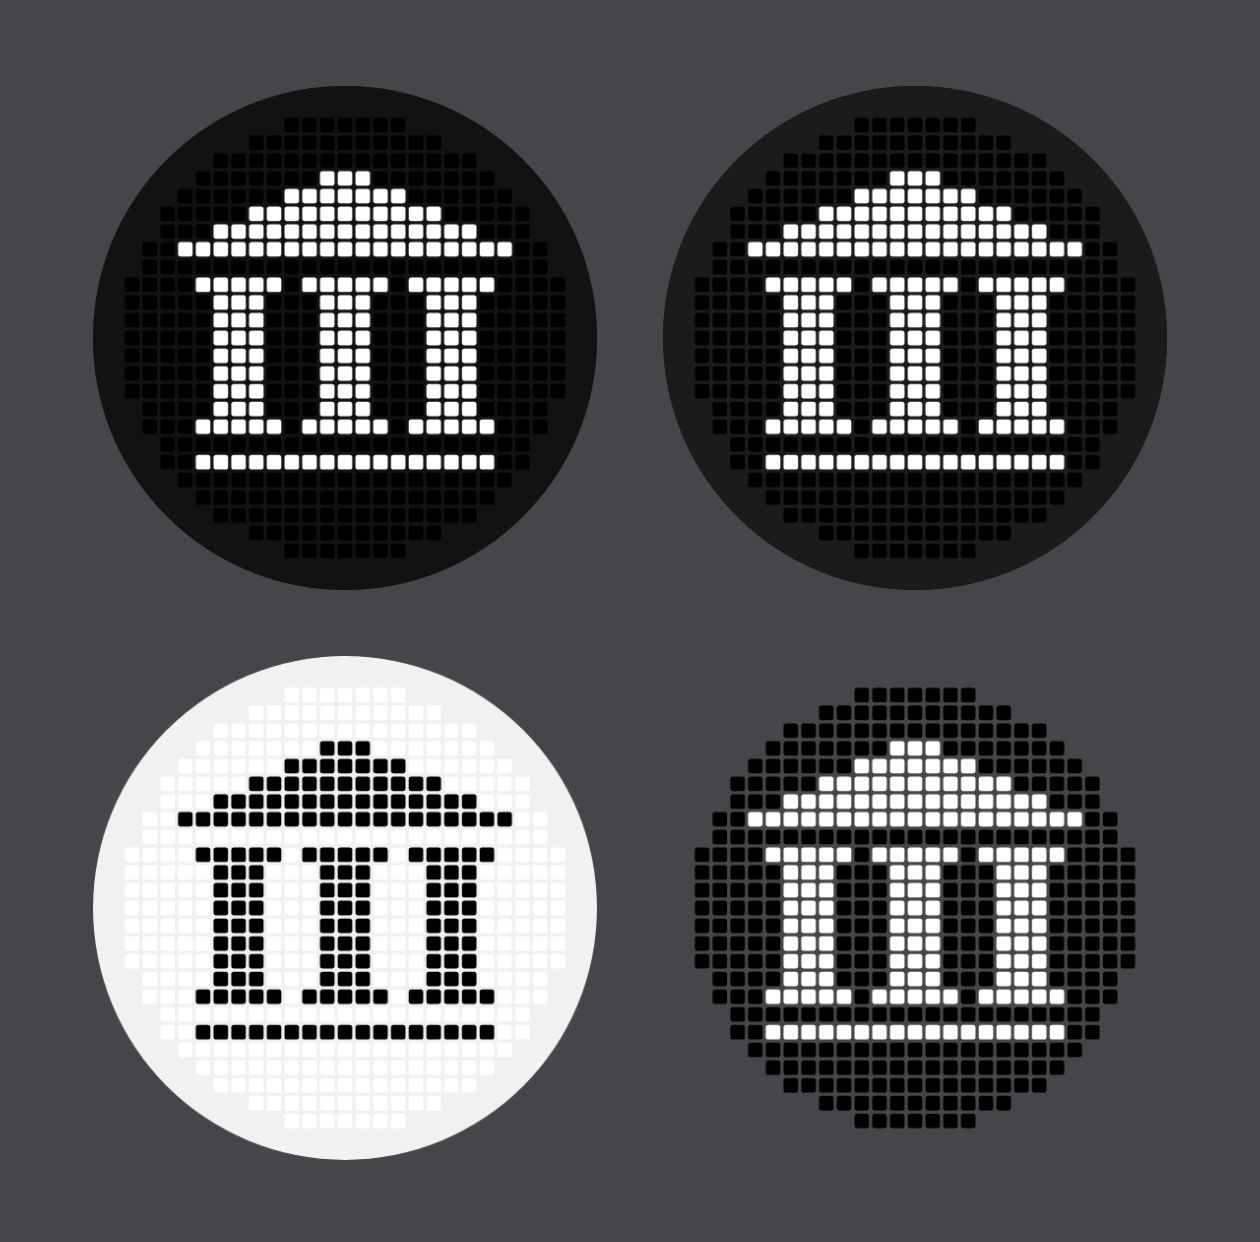
Open the Config tab in the frame selector to pick a background. There are four options, each changing how the widget blends with your home screen.
Default gives you a dark gray circle (#121212). This is the standard look and works well on most wallpapers.
Dark is a slightly lighter dark circle (#1B1B1B) that matches the Nothing OS dark widget style. Great for AMOLED screens and darker wallpapers.
Light is a clean white circle (#F1F1F1) matching the Nothing OS light widget style. Use it to make your glyph art stand out on light wallpapers.
None makes the background fully transparent. Your glyph art sits right on the wallpaper with nothing around it.
 widget-backgrounds.png
Brightness Range
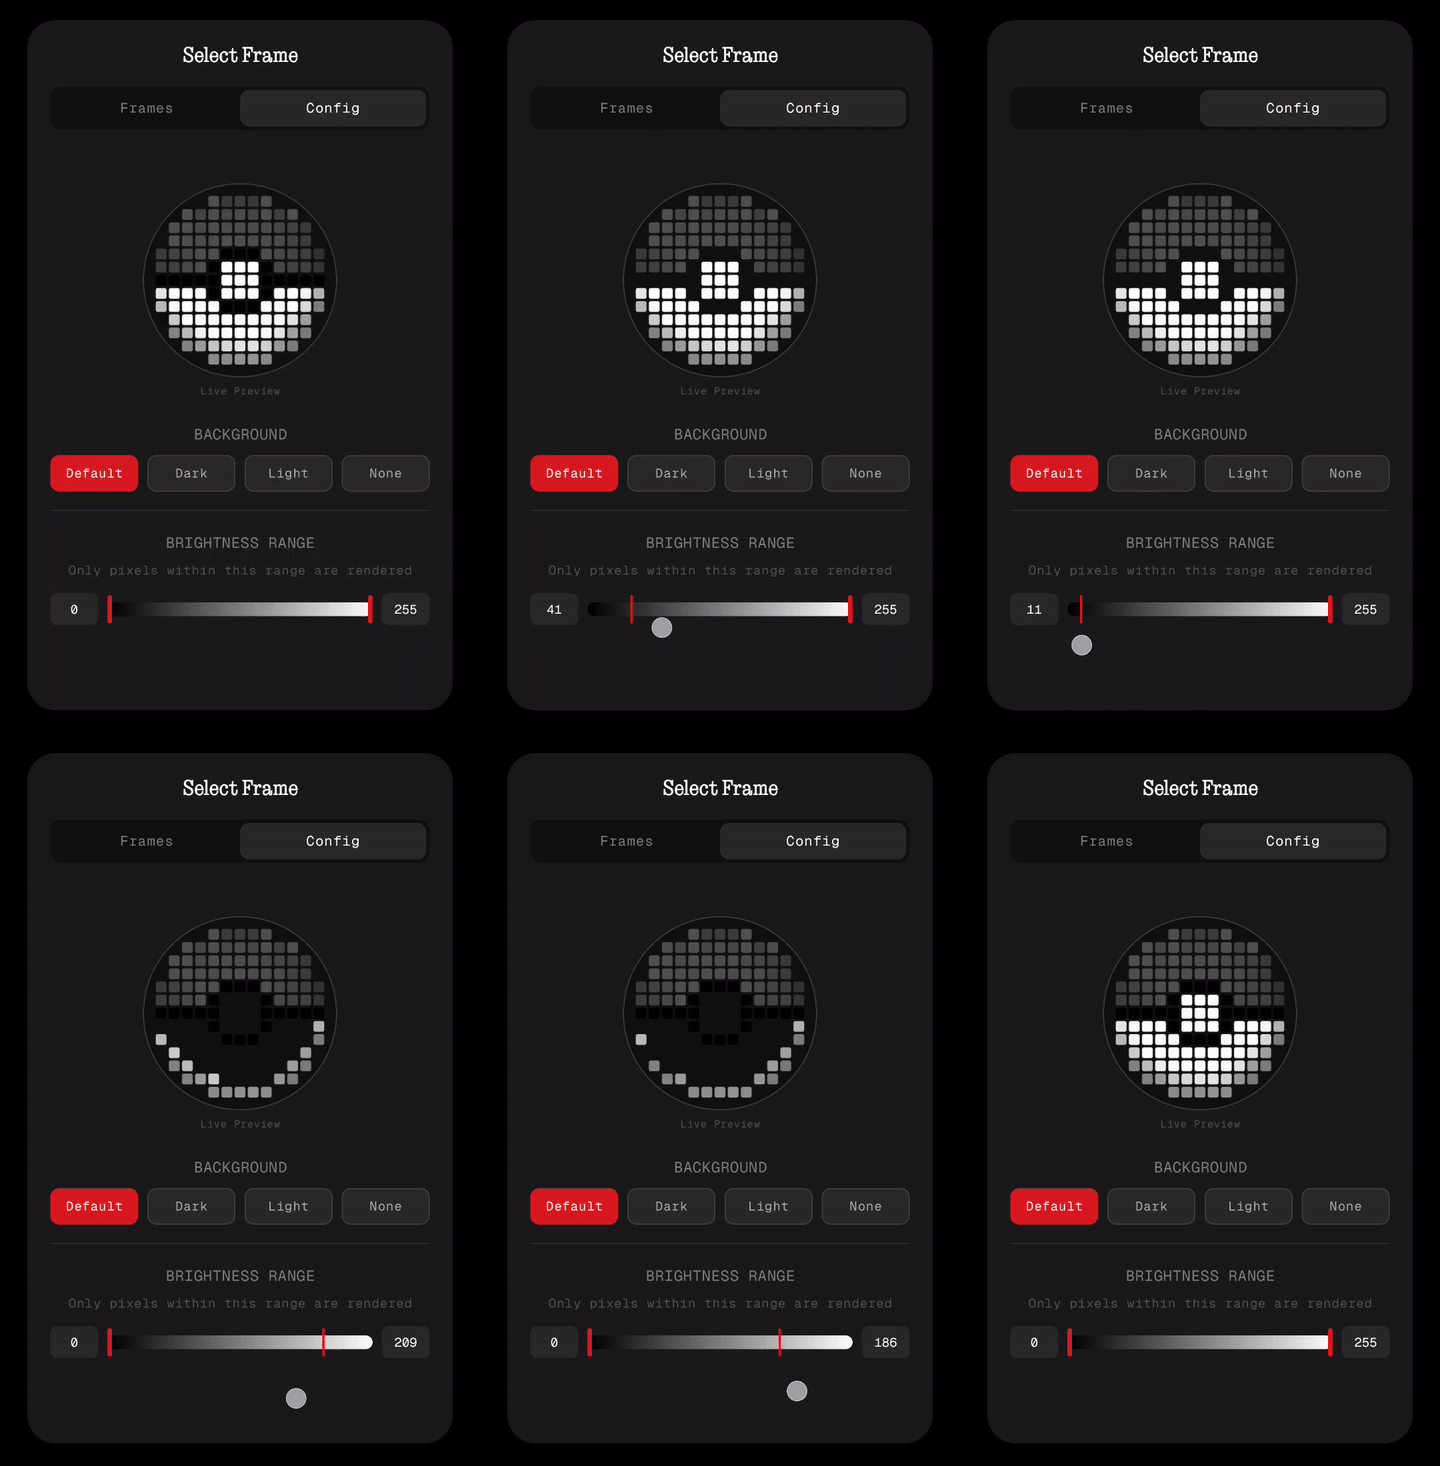
The Config tab also has a Brightness Range slider. It lets you pick which pixels from your art are rendered based on their brightness value (0–255).
Drag the two handles to set a min and max brightness. Any pixel with a brightness outside that range gets hidden. Dimmer pixels disappear if you raise the min. Brighter pixels disappear if you lower the max.
Use the number inputs on each side for precise values. The slider and inputs update live, and you can see the result in the live preview above.
Replaces Float mode
The old "Float" background option is gone. To get the same effect, set the brightness minimum to 1 — it hides fully off pixels and only shows lit LEDs.
 widget-brightness-range.png
Live Preview
The Config tab shows a live preview of your widget at the top. It reflects the background and brightness settings in real-time as you tweak them, so you can see exactly what your widget will look like before you close the selector.
Animated posts loop continuously in the preview, which makes it easy to find the sweet spot for your brightness range on busy animations.
Animated Widgets
Widgets always show the first frame of your animation as a static image. Tap it to play the animation once, and it goes right back to the first frame when it's done.
Why tap-to-play?
Android limits what background processes can do to save battery. Continuous animation would get interrupted by the OS at random points, making it inconsistent and unreliable. Tap-to-play keeps it smooth and intentional every time.
Frame Settings
Any settings you apply to your Frame in the app carry over to the widget. Rotation, flip, invert, effects, animation speed. All of it gets reflected in the widget automatically.
Check out the Frames guide for the full breakdown.
What's Next
Want to get more out of your setup? Check these out: